Punk Rawk Princess Necklace
via Flamingo Toes Anthro Necklace Week of the Paisley Rebirth Necklace
I don't really like the original Anthropologie one... I'm quite a fan of their redo, and I think mine isn't quite so ... cute and chic? I dunno.
This is hers once she finished it:
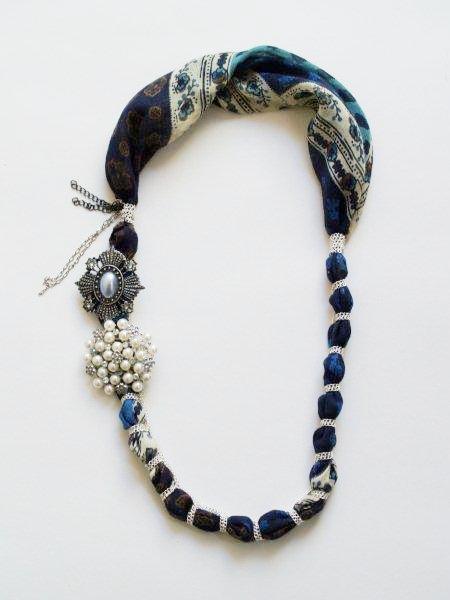 |
| So pretty in blue |
 |
| I thought it'd be neat to pose it on top of books |
It is *highly* recommended that you have a sewing machine to do this, otherwise it's a big pain in the bootang.
Required Materials
- Scarf or lightweight fabric
- If you use a scarf, and it's anything other than paper thin you should cut your material in half width wise
- Chain of your preference, the thinner the better, 4 yards
- I used gunmetal, she used silver
- Small pieces of different chains or bangly/dangly items
- 2 large awesome pieces of decoration
- she used beaded pieces, I used charms; Michaels or Hobby Lobby recommended
- Needle and thread matching the color of the fabric you're using
 |
| Picture of her materials |
With the right sides together, sew the rectangle into a long tube and turn right side out.

Then at this point, turn the raw edges under and overlap them, then sew together (to complete the circle). Then squish it around to look like this:

Put the seam towards the left side (if you were looking at it from this perspective) where you'll place one of your charms, covers up the seams quite nicely.
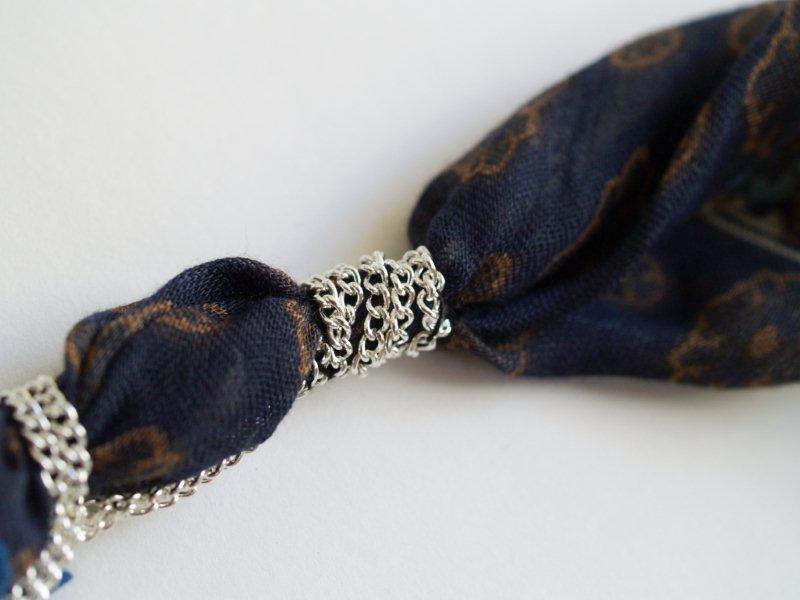
Wrap the chain around the fabric tube twice. Feed the other ends of the doubled chain through the halfway point loop and pull. Don’t pull super tight – you don’t want to stress the chain – but so that it is snug against the fabric.
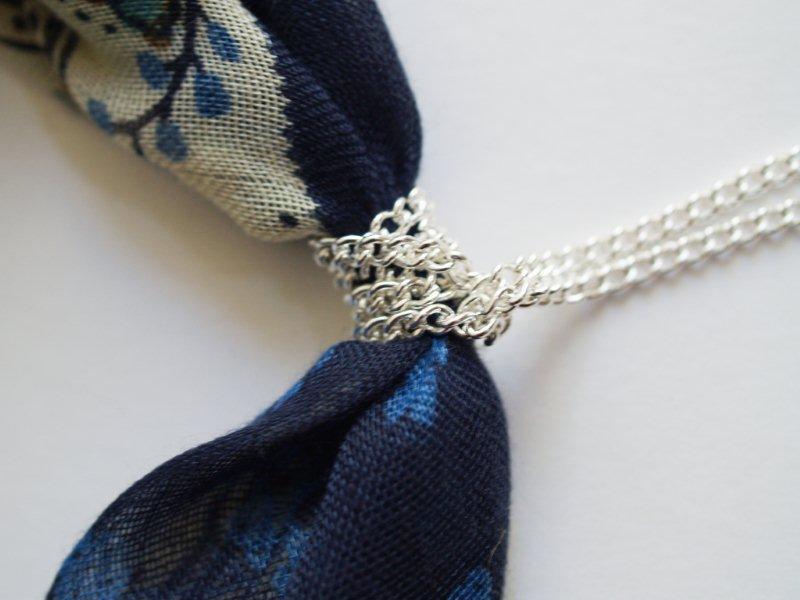 |
| Whee, knot! |
She recommends 1" of spacing between each chain knotting spot. Be sure to scrunch up the fabric a little bit in-between to give it that extra bit of "poufiness". So! Lay the chain along the fabric for about an inch. Hold the chain at that point. Wrap the chain around the fabric tube. Bring the ends up and run them under the wrapped part and pull snug.
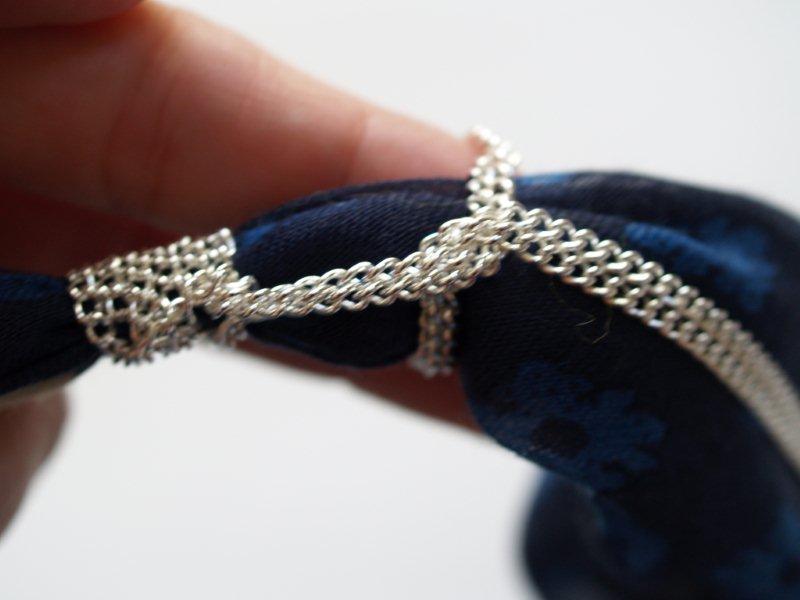 |
| Should look like this when you finish each knot |
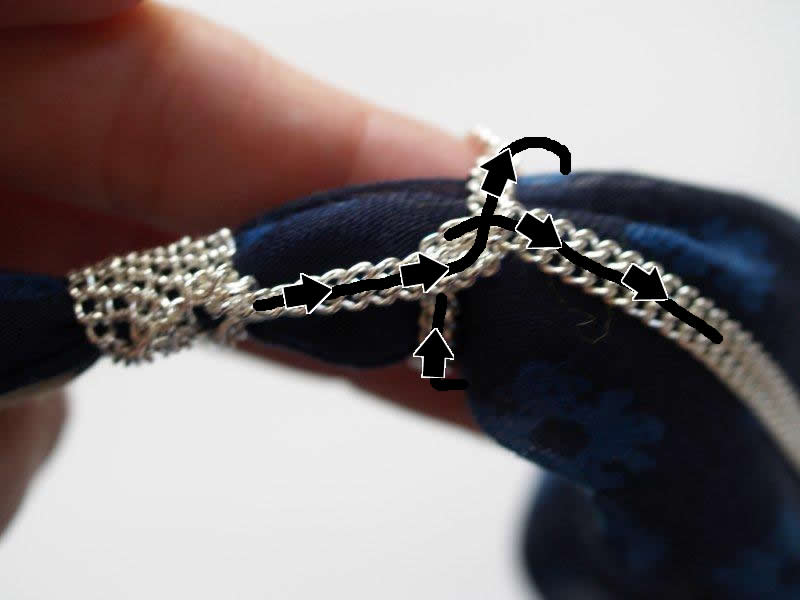 |
| Handy dandy arrow-drawing instruction. Super handy! |
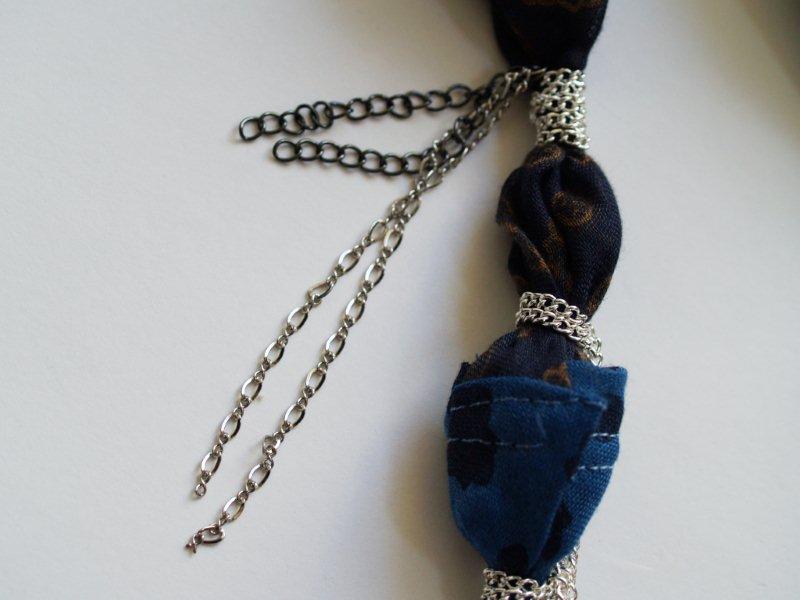
Keep doing this until you get to just above the seam point on the other side. When you get there, wrap the chain around it four times. Sew down the end of your chain, and trim off any extra.
 |
| Tied off |
If you're using chain pieces, fold them in half, and sew those points to the tied off original chaining.
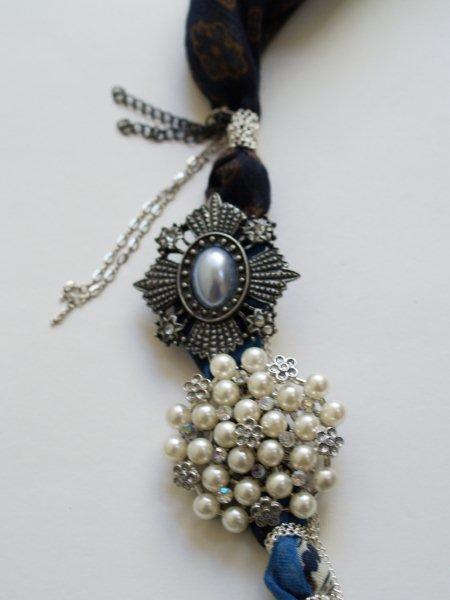
Sew on your large beaded pieces on the left side, making sure you cover up the seam. If you are using pins, pin AND sew them on. I have bad luck and my things always fall off unless I completely ensure they won't move an inch.
And she pinned hers like so:
Isn't that pretty!?
Here's a close up of my pins:

Piece of black chain, very big bubble chain, heart charm, and wing with a bow and pink bead on the end of it.
I've basically worn it once and I'd love to sell it to someone who'd strut this awesome thang around. I'll put in on my etsy store (keep meaning to do that!)
Let me know your thoughts! I bought more charms on sale (50% off) at Hobby Lobby today :-D
**UPDATE** just listed on etsy! Go check it out. Etsy Listing
**UPDATE** just listed on etsy! Go check it out. Etsy Listing
No comments:
Post a Comment